
Campfire bread traces its roots to ancient travelers who needed portable, easy‑to‑cook sustenance. Over the centuries, the simple mixture of flour, water, and yeast became a staple for frontier cooks, offering warmth and nourishment during long nights under the stars.
Why You'll Love It
-
- Minimal ingredients, no fancy equipment needed
-
- Quick bake time, perfect for spontaneous outings
-
- Soft interior with a lightly crisped crust
-
- Versatile – serve with butter, jam, or cheese
"The smell alone made our campsite feel like home, and the bread was delightfully airy!"
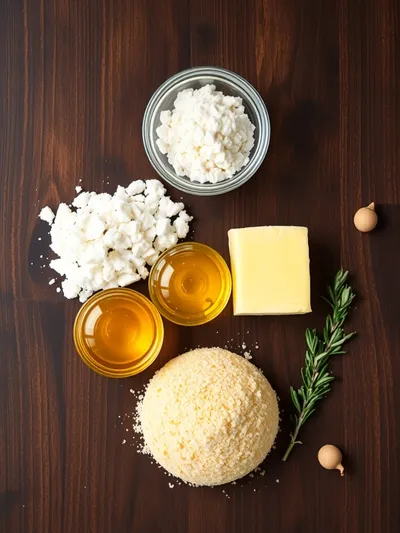
Essential Ingredient Guide
- All‑purpose flour: Choose a good quality flour; it gives the bread its structure and soft crumb.
- Active dry yeast: Fresh yeast helps the dough rise quickly; proof it in warm water before mixing.
- Olive oil: Adds richness and helps keep the crust tender.
- Salt: Enhances flavor; just a pinch is enough.
- Lemon juice: A splash brightens the dough and balances the richness.
- Honey: Provides a subtle sweetness and helps with browning.
 Appetizers & Snacks
BBQ Beef Sausage Bites
Four‑ingredient BBQ beef sausage bites that are smoky, sweet, and perfect for sharing.
Complete Cooking Process
-
Ingredient Readiness:
Measure flour, dissolve yeast in warm water, and set aside to bubble – a small pause that builds anticipation.
-
Flavor Development:
Mix olive oil, honey, and lemon juice into the dough; let it rest so the flavors meld gently.
-
Texture Control:
Knead just until smooth; over‑working can make the crumb tough.
-
Finishing Touches:
Brush the dough with a little extra oil before placing it on the ember for a glossy finish.
-
Serving Timing:
Serve the bread hot, straight from the fire, while the aroma still clings to the air.
-
Keep the fire low and steady; high heat can burn the crust before the inside cooks.
-
Cover the dough loosely with foil if you want a softer top.
-
Use a cast‑iron grill grate for even heat distribution.
-
Let the bread rest a minute after removing from the fire; steam finishes the crumb.
Pro Tips
Well, those little adjustments can turn a good campfire loaf into something truly memorable. When you sit back, the crackle of the fire and the warm scent of fresh bread make the whole experience feel like a gentle hug from nature.
I always find that a simple slice dipped in melted butter is enough to remind me why I love cooking outdoors. It’s a quiet ritual, a pause in the day, and the perfect companion to a starlit night.
 Dinner Recipes
Creamy Tomato Garlic Pasta – Simple, Cheesy & Delicious
A quick, cheesy tomato garlic pasta ready in minutes.

The essence of the dish:
It’s all about the humble dough turning golden over glowing embers, creating a soft interior that practically melts in your mouth.
A fun fact or historical angle:
Early pioneers often baked bread on iron skillets placed directly on coals, a technique that inspired today’s campfire loaf.
Flavor or sensory focus:
You’ll notice a subtle honey‑sweetness, a hint of citrus, and the comforting aroma of toasted flour.
You Must Know
-
Temperature matters – medium‑low fire is key
-
Don’t over‑mix the dough
-
A quick brush of oil adds shine
Frequently Asked Questions
→ Can I use whole‑wheat flour?
Yes, substitute up to half the all‑purpose flour for whole‑wheat; it adds nuttiness and a heartier texture.
→ How long does the dough need to rise?
About 30‑45 minutes in a warm spot; you’ll see it double in size.
→ What if I don’t have a fire pit?
A charcoal grill works fine – just arrange the coals for indirect heat.
→ Can I add herbs or cheese?
Absolutely, fold in fresh rosemary, thyme, or shredded cheddar before the final rise.
→ Is it safe to eat the crust?
Yes, as long as the fire isn’t too hot; a lightly browned crust is delicious.
→ How do I store leftovers?
Wrap the cooled bread in foil and keep it in a sealed bag; it stays fresh for two days.
Nutrition Facts
per serving
210
Calories
5g
Protein
34g
Carbs
6g
Fat
Taste Profile
Warm, mildly sweet, comforting
Ingredient Substitutions
Don't have an ingredient? Try these alternatives
Use up to 50% whole‑wheat to keep the texture light.
Provides similar sweetness; may add a slight caramel note.
Recipe Variations
Try these delicious twists on the original
Spicy Version
Add a teaspoon of cayenne pepper and a pinch of smoked paprika for a subtle kick.
Mediterranean Style
Stir in chopped olives, sun‑dried tomatoes, and a sprinkle of feta before baking.
Common Mistakes to Avoid
Learn from others' mistakes for perfect results
- Cooking over high heat, which burns the crust before the inside sets.
- Skipping the rise, leading to dense bread.
- Over‑kneading, which makes the crumb tough.
Meal Prep & Storage
Make Ahead Tips
You can mix the dough and let it rise overnight in the fridge; bring to room temperature before baking over the fire.
Leftover Ideas
Reheat gently on a low grill or in a skillet with a dab of butter, allowing the crust to crisp again.
Perfect Pairings
Serve this with...
Cooking Timeline
Gather ingredients and proof yeast in warm water.
Mix dough, knead gently, and shape into a round loaf.
Let the dough rise in a warm spot, covered.
Place dough on grill over low embers, cover with foil, and bake.
Remove, let rest a minute, then slice and serve.
 Appetizers & Snacks
Texas Trash Dip – Gooey Cheesy Party Favorite
A gooey cheesy dip perfect for game night gatherings.
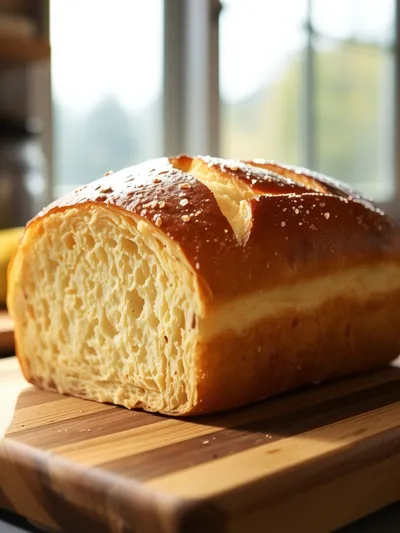
Easy Campfire Bread Recipe – Quick Outdoor Treat
Discover the comfort of warm, fluffy campfire bread baked right over an open flame—simple ingredients, quick steps, and that rustic aroma that makes any adventure feel like home.
Timing
Prep Time
15 Minutes
Cook Time
20 Minutes
Total Time
35 Minutes
Recipe Details
Ingredients
Dough
-
01
3 cups all‑purpose flour
-
02
1 tsp active dry yeast
-
03
1 tsp salt
-
04
1 tbsp honey
-
05
2 tbsp olive oil
-
06
1 cup warm water (110°F)
-
07
1 tsp lemon juice
Instructions
In a small bowl, dissolve yeast in warm water with a pinch of sugar; let it sit until foamy, about 5 minutes.
In a mixing bowl, combine flour, salt, honey, olive oil, lemon juice, and the yeast mixture. Stir until a shaggy dough forms.
Turn the dough onto a floured surface, knead gently for 5‑6 minutes until smooth. Cover with a damp cloth and let rise for 30‑45 minutes.
Shape the dough into a round loaf, brush lightly with oil, and place on a pre‑heated cast‑iron grill grate over low ember heat. Cover loosely with foil.
Bake for 15‑20 minutes, turning once, until the crust is golden and the interior sounds hollow when tapped.
Notes & Tips
-
1
If you like a sweeter touch, sprinkle a little extra honey on the top before baking.
-
2
A pinch of dried herbs can add surprising depth.
-
3
Avoid high flames; they can scorch the crust before the inside cooks.
 Quick & Easy Recipes
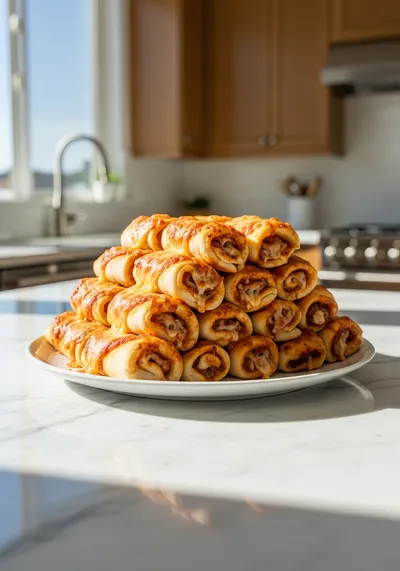
High Protein Turkey Pizza Rolls
Crispy, cheesy turkey pizza rolls packed with protein – perfect for a quick snack or light meal.
Tools You'll Need
-
Cast‑iron grill grate
-
Large mixing bowl
-
Wooden spoon
-
Kitchen towel
-
Foil
-
Meat thermometer (optional)
Must-Know Tips
-
Don’t overcrowd the fire, keep the heat gentle ...
-
Let the dough rest, Allows flavor to develop ...
-
Taste the dough before baking, Adjust seasoning ...
Professional Secrets
-
Room temperature ingredients, Ensures even rising
-
Low indirect heat, Creates a soft interior with a crisp crust
-
Cover with foil, Captures steam for a fluffy crumb

Recipe by
EsterEster is a seasoned food blogger and recipe creator who brings a fresh, approachable voice to Lancefood’s vibrant culinary community. With over eight ...
Get Delicious Recipes Weekly
Join 25,000+ home cooks getting our best recipes straight to their inbox.
Free forever • No spam • Unsubscribe anytime