
The tradition of marking academic milestones with sweet treats dates back to ancient festivals where grain breads were shared. Over centuries, the humble cake evolved into a canvas for expression. Today, a playful cake can add a splash of color to any ceremony, echoing the vibrancy of new chapters.
Why You'll Love It
-
- Light sponge that stays moist for days
-
- Easy to customize with any color palette
-
- No fancy equipment needed, just love and a mixer
-
- Fun to assemble with the kids for extra giggles
"My niece begged for seconds, and the whole family couldn't stop laughing at the cheeky decorations!"
Essential Ingredient Guide
- All‑purpose flour: Provides structure; sift for the fluffiest crumb.
- Baking powder: Leavens the batter; ensures a soft rise.
- Vanilla extract: Adds a warm, familiar aroma that ties the flavors together.
- Food‑coloring gels: Choose bright hues; a few drops give vivid pastel shades.
- Lemon juice: Brightens the batter and balances sweetness.
- Powdered sugar: Creates a smooth frosting; sift to avoid lumps.
 Appetizers & Snacks
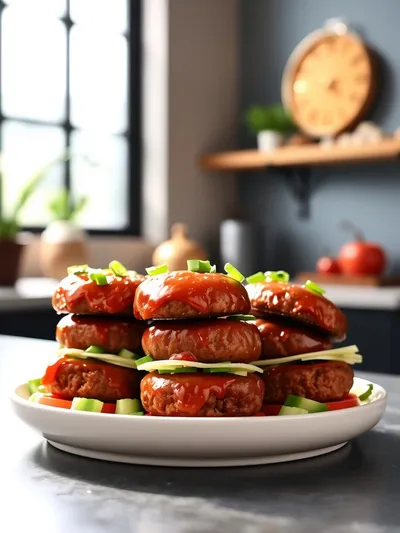
BBQ Beef Sausage Bites
Four‑ingredient BBQ beef sausage bites that are smoky, sweet, and perfect for sharing.
Complete Cooking Process
-
Ingredient Readiness:
Measure and sift dry ingredients, bring butter to room temperature, and pre‑heat the oven to 350°F (175°C).
-
Flavor Development:
Cream butter and sugar until light, then fold in eggs and vanilla, letting the scent fill the kitchen.
-
Texture Control:
Gently incorporate flour and baking powder, avoiding over‑mixing so the crumb stays tender.
-
Finishing Touches:
Divide batter, color each portion, bake, then layer with fluffy frosting and playful decorations.
-
Serving Timing:
Allow the cake to cool completely before frosting; serve at room temperature for the best texture.
-
Use gel food coloring for vivid, non‑watery hues.
-
Swap lemon juice for orange zest for a citrus twist.
-
Chill the cake for 15 minutes before frosting to prevent crumbs.
-
Add a pinch of salt to enhance sweetness.
Pro Tips
Well, I find that a brief chill lets the frosting sit nicely without sliding off. It also gives the crumb a chance to settle, making each slice look tidy. So, take a moment, then plate with confidence—yeah, the cake will thank you.
 Dinner Recipes
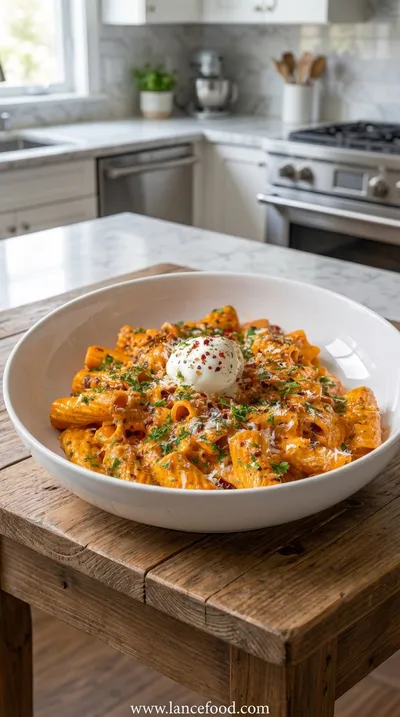
Creamy Tomato Garlic Pasta – Simple, Cheesy & Delicious
A quick, cheesy tomato garlic pasta ready in minutes.
The essence of the dish:
A light vanilla sponge cut into layers, tinted in pastel shades, and frosted with a silky buttercream that whispers of celebration.
A fun fact or historical angle:
Did you know that graduation caps were originally worn in medieval universities to signify scholarly achievement? That same sense of honor lives on in today’s cake toppers.
Flavor or sensory focus:
The first bite offers a gentle vanilla perfume, a soft, melt‑in‑your‑mouth crumb, followed by the creamy, sweet frosting that lingers with a hint of citrus.
You Must Know
-
Keep batter at room temperature for even rise
-
Do not over‑bake; the cake should spring back slowly
-
Use a gentle hand when spreading frosting
Frequently Asked Questions
→ Can I make this cake gluten‑free?
Absolutely—swap all‑purpose flour for a 1:1 gluten‑free flour blend and ensure your baking powder is certified gluten‑free.
→ How far ahead can I bake the layers?
Bake the layers up to two days ahead; store them wrapped in plastic at room temperature. Frost just before serving.
→ What if I don’t have gel food coloring?
You can use liquid food coloring, but add less to avoid thinning the batter, or fold in natural powders like beet or matcha.
→ Is there a dairy‑free version?
Yes, use a plant‑based butter and dairy‑free powdered sugar; the texture remains light and airy.
→ Can I add fresh fruit inside?
Sure, a thin layer of sliced strawberries or blueberries between the cakes adds a burst of flavor without sogginess.
→ How long does the cake stay fresh?
Stored in an airtight container, it stays soft for up to four days at room temperature.
Nutrition Facts
per serving
290
Calories
4g
Protein
42g
Carbs
12g
Fat
Taste Profile
Bright, sweet, and lightly citrusy
Ingredient Substitutions
Don't have an ingredient? Try these alternatives
Choose a brand with a neutral taste for similar texture.
Use full‑fat versions to maintain moisture.
Recipe Variations
Try these delicious twists on the original
Spicy Version
Add a pinch of cayenne to the batter and swirl in a jalapeño‑infused frosting for a surprising kick.
Mediterranean Style
Incorporate orange zest into the batter and top with a honey‑yogurt glaze and toasted almonds.
Common Mistakes to Avoid
Learn from others' mistakes for perfect results
- Over‑mixing the batter, which makes the cake tough.
- Baking at too high temperature, causing a dry crumb.
- Applying frosting before the cake is completely cool.
Meal Prep & Storage
Make Ahead Tips
You can bake the layers a day ahead, wrap them tightly, and keep the frosting refrigerated; bring to room temperature before assembling.
Leftover Ideas
Store any leftover cake in a sealed container; enjoy cold slices with a cup of tea for a gentle treat.
Perfect Pairings
Serve this with...
Cooking Timeline
Gather and measure all ingredients; preheat oven.
Cream butter and sugar, add eggs, then incorporate dry ingredients.
Divide batter, color portions, bake layers.
Cool cakes, prepare buttercream frosting.
Assemble, frost, and decorate the cake.
 Appetizers & Snacks
Texas Trash Dip – Gooey Cheesy Party Favorite
A gooey cheesy dip perfect for game night gatherings.

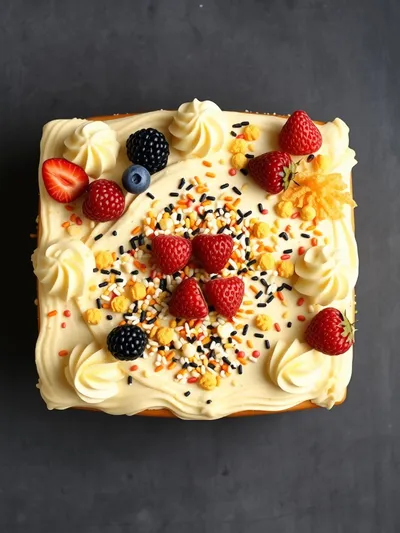
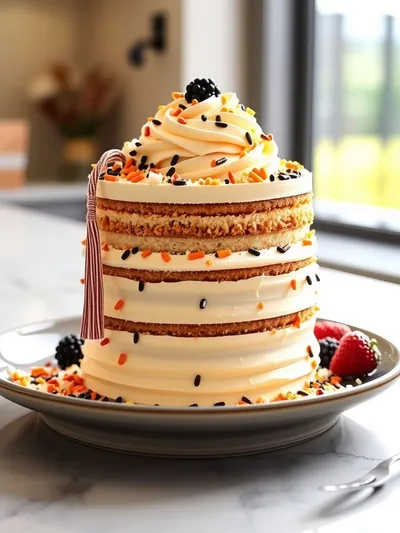
Silly Graduation Cake
A whimsically decorated cake that captures the joy of graduation, with bright colors, light sponge, and a playful frosting that brings smiles to every graduate and guest.
Timing
Prep Time
20 Minutes
Cook Time
30 Minutes
Total Time
50 Minutes
Recipe Details
Ingredients
Cake Layers
-
01
2 ½ cups all‑purpose flour
-
02
1 ½ tsp baking powder
-
03
¼ tsp salt
-
04
½ cup unsalted butter, softened
-
05
1 cup granulated sugar
-
06
3 large eggs, room temperature
-
07
1 tsp vanilla extract
-
08
½ cup whole milk
-
09
1 tbsp lemon juice
-
10
Food‑coloring gels (pink, blue, yellow)
Buttercream Frosting
-
01
1 cup unsalted butter, softened
-
02
3‑4 cups powdered sugar, sifted
-
03
2 tbsp milk
-
04
½ tsp vanilla extract
-
05
Pinch of salt
Instructions
Preheat the oven to 350°F (175°C). Grease three 8‑inch round cake pans and line the bottoms with parchment.
In a bowl, whisk together flour, baking powder, and salt; set aside.
Using a mixer, cream butter and sugar until pale and fluffy, about 3‑4 minutes; add eggs one at a time, then stir in vanilla and lemon juice.
Gradually add the dry mixture alternating with milk, beginning and ending with dry ingredients; mix just until incorporated.
Divide the batter into three bowls; color each with a different gel, stirring gently until uniform.
Pour each colored batter into its prepared pan and bake 18‑20 minutes, or until a toothpick comes out clean; let cool in pans for 5 minutes, then transfer to a wire rack.
While the cakes cool, prepare the buttercream: beat butter until creamy, gradually add powdered sugar, milk, vanilla, and a pinch of salt, beating until light and airy.
Level the tops of each cake layer, then stack them, spreading a thin coat of frosting between each layer and around the sides; decorate with whimsical sprinkles or edible toppers.
Notes & Tips
-
1
If you prefer a richer flavor, substitute half the milk with buttermilk.
-
2
Make sure the butter is truly at room temperature for a smooth frosting.
-
3
For a themed look, pipe the frosting in concentric circles and use a pastel palette.
 Quick & Easy Recipes
High Protein Turkey Pizza Rolls
Crispy, cheesy turkey pizza rolls packed with protein – perfect for a quick snack or light meal.
Tools You'll Need
-
Three 8‑inch round cake pans
-
Electric mixer
-
Mixing bowls
-
Spatula
-
Piping bag
-
Cooling rack
Must-Know Tips
-
Don’t over‑mix the batter; it keeps the crumb tender.
-
Use gel colors for bright shades without thinning the batter.
-
Cool cakes completely before frosting to avoid melting.
Professional Secrets
-
Cream butter and sugar until the mixture holds a ribbon shape; this traps air for a fluffy crumb.
-
Bake on the middle rack for even heat distribution.
-
Chill the assembled cake for 15 minutes before final frosting for a smooth finish.
Recipe by
JenniferJennifer is a seasoned food blogger and recipe creator who brings a fresh, home‑cooked vibe to Lancefood’s ever‑growing collection of dishes. With ove ...
Get Delicious Recipes Weekly
Join 25,000+ home cooks getting our best recipes straight to their inbox.
Free forever • No spam • Unsubscribe anytime