Have you ever pondered the possibility of undertaking a toilet installation yourself, potentially saving both time and financial resources, or is professional installation the sole guarantee of a satisfactory outcome? This exhaustive guide is designed to furnish you with the requisite knowledge and competencies for a successful toilet installation, irrespective of whether you opt for a DIY approach or seek professional assistance. Delve into the critical steps, advice, and techniques that can streamline your toilet replacement endeavor.
From grasping the nuances of various toilet models to assembling the necessary tools, we stand ready to support you. Our objective is to imbue you with the assurance to initiate your installation project. For additional guidance, refer to this resourceful link to enhance your home’s security and efficiency.
Key Takeaways
- Learn the basics of toilet installation to make informed decisions.
- Understand the importance of measuring your space prior to installation.
- Get familiar with different toilet types and features.
- Discover essential tools you’ll need for both DIY and professional installations.
- Explore eco-friendly options that contribute to water conservation.
- Gain insights on common toilet installation problems and how to troubleshoot them.
Understanding the Basics of Toilet Installation
For the DIY aficionado, grasping the fundamentals of toilet installation is paramount. This comprehension is the cornerstone of a comprehensive toilet installation guide. It empowers homeowners to select the appropriate toilet and assemble the requisite tools with assurance.
Types of Toilets to Consider
The array of toilet options available caters to diverse tastes and requirements. Familiarity with these alternatives simplifies the selection process:
- One-Piece Toilets: Characterized by their unified tank and bowl design, these toilets offer a streamlined aesthetic and facilitate cleaning.
- Two-Piece Toilets: A classic choice, this variety separates the bowl from the tank, facilitating easier transportation and installation.
- Wall-Mounted Toilets: This contemporary style mounts directly to the wall, conserving space, concealing plumbing, and presenting a modern appearance.
Essential Tools for Installation
For a flawless installation, specific tools are critical. Below is a compilation of indispensable tools for toilet installation:
- Wrench: Essential for tightening bolts and nuts.
- Plunger: Useful for clearing obstructions prior to installation.
- Level: Crucial for ensuring the toilet’s even positioning on the floor.
- Screwdriver: Required for assembling components and securing the toilet to the floor.
Preparing Your Space for Installation
The success of a toilet installation hinges on meticulous preparation. Accurate measurement of bathroom dimensions, efficient removal of the old toilet, and verification of drainage systems are paramount. These steps are essential to ensure a seamless installation process.
Measuring the Space
Initiating the process requires precise measurement of the bathroom area. It is imperative to record the distance from the back wall to the center of the drain pipe, the width for the toilet’s footprint, and the height to surrounding fixtures. Such measurements are critical for a flawless fit, guaranteeing both comfort and convenience.
Removing the Old Toilet
The removal of the old toilet necessitates caution to prevent damage to plumbing. The steps include:
- Shutting off the water supply to the toilet.
- Flushing the toilet to empty the tank and bowl.
- Disconnecting the water supply line.
- Removing the nuts securing the toilet to the floor.
- Lifting the toilet carefully and setting it aside.
It is crucial to drain any residual water to prevent spills during the removal process.
Ensuring Proper Drainage
Before installing the new toilet, verifying the functionality of drainage is essential. Inspect the plumbing for alignment and blockages. Consider the following:
- Inspect for leaks or damage around the flange.
- Assess the condition of the wax seal beneath the toilet.
- Verify the drain pipe’s clarity from obstructions.
Investing time in ensuring proper drainage can prevent future plumbing issues and enhance the efficiency of your new toilet installation.
Choosing the Right Toilet for Your Bathroom
The selection of an ideal toilet for domestic use necessitates an examination of multiple factors, encompassing brand credibility, critical functionalities, and ecological footprint. Engaging in research on prominent toilet brands facilitates the narrowing down of options. Renowned manufacturers such as Kohler, American Standard, and TOTO stand out, each providing a distinct array of features tailored to meet diverse consumer requirements.
Comparing Popular Brands
An analysis of the most esteemed brands offers valuable insights into the top-tier options available. This comparison encompasses:
| Brand | Key Features | Average Price Range |
|---|---|---|
| Kohler | Comfort height, Quiet Close seats | $200 – $600 |
| American Standard | Eco-friendly toilets, powerful flushing | $150 – $500 |
| TOTO | Siphon Jet technology, sleek designs | $300 – $800 |
Features to Look For
When selecting a toilet, it is imperative to prioritize certain features. Key considerations include:
- Height: Comfort height options provide easier access.
- Flush Type: Dual-flush toilets offer water efficiency.
- Water Efficiency: Look for models with low gallons per flush.
- Design: Choose styles that complement your bathroom decor.
Eco-Friendly Options
Opting for eco-friendly toilets represents a sustainable choice for homeowners. These models, characterized by their reduced water consumption, do not compromise on performance. Low-flow toilets, in particular, are advantageous, enabling a reduction in water usage while maintaining effective flushing capabilities. Investing in eco-friendly options not only conserves natural resources but also contributes to cost savings on water bills.
What to Expect During the Installation Process
The commencement of the toilet installation process heralds a blend of anticipation and apprehension. This phase encompasses a series of critical steps, pivotal to the optimal functioning of your new toilet. Familiarity with the typical installation procedures facilitates a more fluid experience, thereby aligning expectations with the actual installation duration.
Common Installation Steps
The installation of a toilet adheres to a sequence of fundamental actions. Each step is indispensable, contributing to the overall efficiency and success of the endeavor. The following enumerates the common procedures involved:
- Prepare the Area: Clear the space around the toilet and ensure it is clean and ready for the new installation.
- Position the Toilet: Align the toilet over the existing flange, ensuring it rests evenly on the floor.
- Secure the Toilet: Use bolts to fasten the toilet to the floor, ensuring a tight and stable setup.
- Connect the Water Line: Attach the water supply line to the toilet’s tank, ensuring a secure connection to avoid leaks.
- Test the Setup: After connecting everything, turn on the water supply and check for leaks while flushing to confirm proper function.
Timeline for Completion
Grasping the installation timeline is crucial for managing project expectations. Typically, the entire toilet installation process can be completed within a few hours, contingent upon the individual’s level of experience:
| Task | Estimated Time |
|---|---|
| Preparation and Planning | 30-60 minutes |
| Removing Old Toilet (if applicable) | 30-45 minutes |
| Installing New Toilet | 1-2 hours |
| Testing for Leaks | 15-30 minutes |
With meticulous planning and adherence to the standard installation protocols, the process becomes both manageable and gratifying.
Gathering Your Installation Supplies
Initiating your toilet installation endeavor necessitates the compilation of requisite supplies, pivotal for a seamless and expedient execution. This entails procuring not only the indispensable plumbing apparatus for the installation but also the safety equipment for DIY endeavors, imperative for personal protection.
Plumbing Supplies You’ll Need
Proper preparation is fundamental to the success of your installation. Ensure the collection of the following essential toilet installation supplies:
- Wax ring
- Flange
- Bolts and washers
- Flexible water supply line
- Toilet tank gasket
The aforementioned plumbing supplies for installation are crucial, guaranteeing the toilet’s secure mounting and proper sealing to avert leaks.
Safety Equipment Essentials
Ensuring safety should be paramount in any DIY endeavor. Acquire the necessary safety equipment for DIY tasks, encompassing:
- Gloves for hand protection
- Safety goggles for eye safety
- A face mask to avoid inhaling dust
- Non-slip shoes to prevent falls
Donning the appropriate attire will safeguard you during your plumbing endeavors. For a comprehensive guide on the installation process, consult this informative resource.
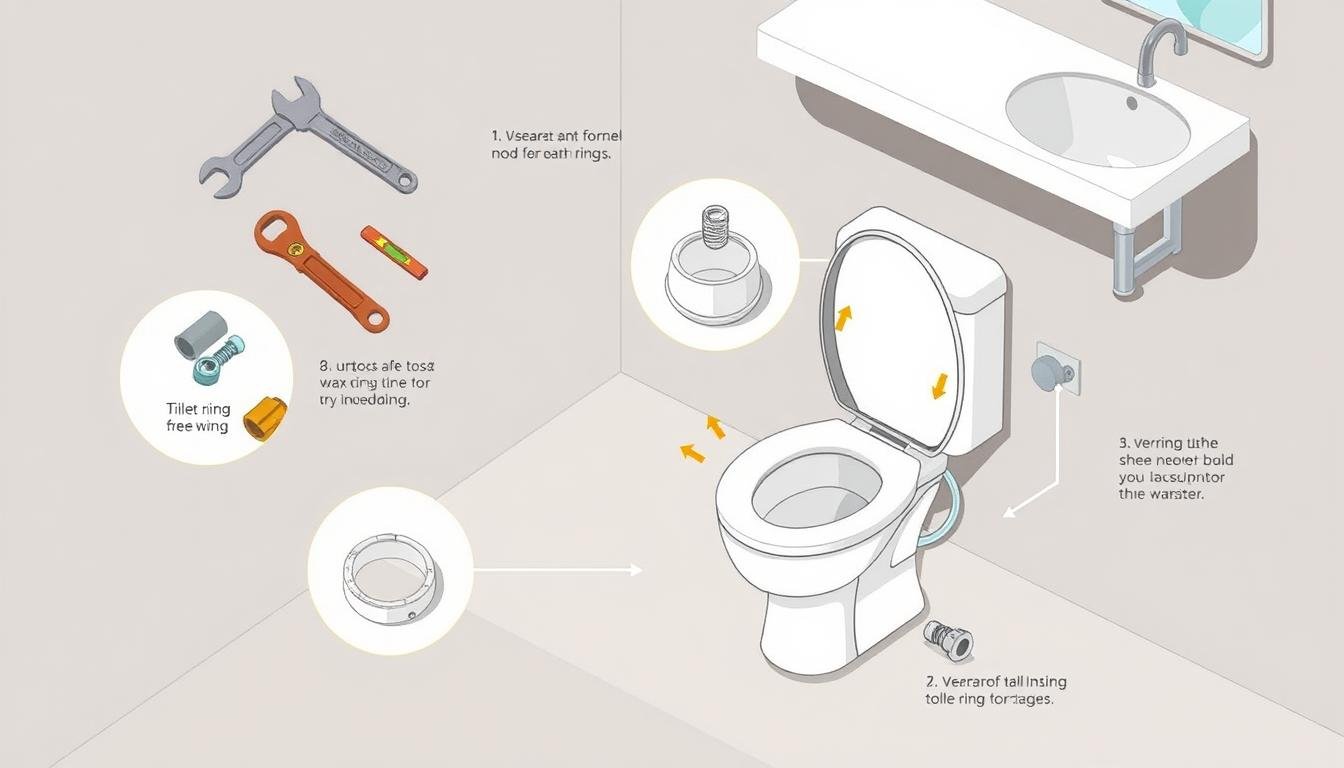
Step-by-Step Guide to Toilet Installation
The installation of a toilet, while seemingly complex, can be navigated through a systematic approach. Each phase is indispensable for a successful outcome, ensuring the toilet’s functionality.
Securing the Wax Ring
The initial step involves positioning the wax ring on the flange. It is imperative to ensure its central alignment and firm application to establish a watertight seal. This foundational step is critical, as it prevents water leaks and guarantees a stable connection between the toilet and the sewer line.
Attaching the Toilet Bowl
The subsequent phase involves lifting the toilet bowl and aligning it over the wax ring. A gentle pressing motion is employed to achieve proper seating, accompanied by a rocking motion to address any air pockets. Subsequently, the bolts are inserted into the flange while maintaining the bowl’s position. The nuts are then tightened, but with caution to avoid over-tightening, which could potentially damage the toilet.
Fitting the Tank
The bowl’s securement precedes the tank’s installation. The tank is positioned over the bowl’s mounting bolts, ensuring precise alignment. A rubber gasket is applied to seal the interface between the tank and bowl. The tank is then secured by tightening the nuts, a critical step to prevent leaks between the tank and bowl.
Connecting the Water Supply
The act of connecting the water supply is paramount in the correct installation of a toilet. It guarantees that water is channeled efficiently to the toilet, thereby ensuring optimal functionality. Familiarity with the various water supply line materials is imperative for making informed decisions during this process.
Understanding Water Supply Lines
Water supply lines are fabricated from diverse materials, including copper, PEX, and flexible braided hoses. Each material boasts its own set of advantages:
- Copper: Exhibits exceptional durability and resistance to corrosion. Installation necessitates soldering proficiency.
- PEX: Possesses flexibility and ease of installation. It can be effortlessly cut and connected without the need for specialized tools.
- Flexible Braided Hoses: Simple to employ and suited for confined spaces. They facilitate straightforward connection to the toilet and water shut-off valve.
How to Secure Connections
Properly securing toilet connections is critical to avert leaks. Adherence to the following steps is imperative for a reliable setup:
- Verify that all components are immaculately clean and dry prior to connection.
- Apply Teflon tape to threaded connections to enhance sealing efficacy.
- Secure connections with care, avoiding over-tightening which can compromise the integrity of the fittings.
- Gradually activate the water supply to detect leaks while observing the connecting water supply.
Adherence to these guidelines will facilitate the secure connection of water supply lines, thereby ensuring prolonged performance. In the event of uncertainty during installation, consulting with plumbing experts at local home improvement centers or referring to reliable online tutorials is advisable.
Testing Your Installed Toilet

Upon completion of the toilet installation, a series of checks is imperative to affirm the functionality of the installation. This process entails the examination of both the plumbing connections and the flushing mechanism. It is a critical phase that confirms the correct installation of the toilet and its efficient operation.
Checking for Leaks
The initial step involves the detection of leaks, a crucial measure to prevent water damage and ensure the toilet’s optimal performance. The inspection should focus on several key areas:
- Base of the toilet: Any water pooling around the base indicates a potential issue with the wax ring or the bolts securing the toilet to the floor.
- Tank connections: The area where the tank connects to the bowl, along with the water supply line, should be examined for signs of moisture, suggesting leaks that may require tightening or replacement.
Ensuring Proper Flushing
The subsequent step involves conducting flushing tests to verify the toilet’s flushing efficiency. The following procedures should be followed:
- Observe the flush mechanism by pressing the handle or button. It should operate smoothly without resistance.
- After a flush, inspect the bowl to ensure the water is adequately cleared. Any issues may point to problems with the flapper valve or the flushing system.
- Perform multiple tests to confirm consistent performance. Any irregularities could indicate deeper plumbing issues.
Troubleshooting Common Toilet Issues
Post-installation, various toilet malfunctions may arise. It is imperative to recognize these problems and implement swift solutions. This discourse delves into the realms of leak detection and flushing anomalies, aiming to maintain your toilet’s operational efficacy.
Addressing Leaks
Leakage is a prevalent concern for homeowners. If water accumulation is observed near the toilet base, several troubleshooting avenues are available:
- Inspect the wax seal: A compromised or improperly fitted wax ring can precipitate leaks. Verify the seal’s integrity and replace it if necessary.
- Examine the toilet’s floor bolts: Tightening these bolts may rectify leaks stemming from loose connections.
- Assess the water supply line: Confirm the integrity of the connection between the supply line and the tank. A worn washer in the connector can be replaced to mitigate leaks.
In cases where these measures fail to resolve the leak, further diagnostic efforts may be warranted. For more in-depth guidance, refer to this resource for supplementary troubleshooting strategies.
Flushing Problems
Flushing malfunctions can be particularly vexing. If your toilet’s flushing performance is subpar, consider the following troubleshooting steps:
- Verify the flapper’s functionality: A flapper that fails to seal properly can impede flushing efficiency. Adjust or replace it as required.
- Examine the chain’s length: The chain should possess sufficient slack to enable the flapper’s complete lift during flushing.
- Review the tank’s water level: An inadequately filled tank may not generate sufficient flushing pressure. Adjust the float valve to optimize water level.
For further insights into resolving flushing issues, consult this comprehensive guide. Mastery over these common toilet malfunctions will ensure your toilet’s continued reliability within your domicile.
Maintaining Your Toilet After Installation
The maintenance of your toilet is crucial for its enduring performance and functionality. By adopting a few straightforward practices, you can ensure not only its cleanliness but also its operational efficiency. This segment will delve into critical routine cleaning methodologies and enduring maintenance strategies.
Routine Cleaning Tips
Consistent cleaning is imperative for maintaining your toilet’s luster and preventing the accumulation of harmful bacteria and stains. The following cleaning tips for toilets are particularly effective:
- Employ a premium toilet cleaner, formulated to combat stubborn stains and odors.
- Weekly scrubbing of the toilet bowl with a brush, focusing on inaccessible regions, is recommended.
- Regular sanitization of the toilet seat and handle is crucial, as these areas are prone to harboring germs.
- Regular flushing helps in preventing water stains from forming in the bowl.
- Utilizing toilet tablets that offer continuous cleaning with each flush, without compromising the fixture’s integrity, is advisable.
Long-Term Maintenance Advice
Long-term toilet care is paramount to circumvent potential problems in the future. The following practices are highly recommended:
- Annual inspection of the toilet’s components, such as the flapper and fill valve, is necessary to ensure their proper functioning.
- Adjusting the water level in the tank optimizes efficiency and minimizes water waste.
- Implementing a schedule for more thorough cleaning every few months is advisable to remove any accumulated buildup.
- Monitoring for leaks or unusual sounds is essential; addressing these promptly can prevent costly repairs and save time.
- Having toilet maintenance supplies, such as plungers and wrenches, readily available is prudent in case of any unforeseen issues.
Eco-friendly Toilet Installation Tips
Adopting eco-friendly practices during the installation of toilets can significantly contribute to water conservation, thereby enhancing the efficiency of bathroom spaces. The essence of an eco-friendly toilet installation transcends the mere selection of products; it encompasses the broader impact these products have on water conservation within the home environment.
Benefits of Low-Flow Toilets
Low-flow toilets emerge as a preferred option for contemporary bathrooms, owing to their multifaceted advantages. These benefits are pivotal in shaping the choice for homeowners seeking to optimize their bathroom’s functionality and environmental footprint.
- Reduced Water Consumption: Low-flow toilets exhibit a marked reduction in water usage per flush, compared to conventional models. This reduction in water consumption translates into lower utility bills for homeowners.
- Environmental Impact: Opting for low-flow toilets is a step towards water conservation, thereby supporting broader sustainability initiatives.
- Improved Efficiency: Many low-flow models are designed to clear waste effectively, eliminating the need for excessive water pressure, thus enhancing overall efficiency.
How to Reduce Water Use
Strategies beyond the selection of low-flow toilets can also contribute to water conservation in bathroom spaces.
- Install a Dual-Flush System: This feature empowers users to select between a partial or full flush, depending on the nature of the waste, thereby optimizing water usage.
- Adjust Your Toilet’s Tank: Modifying the float mechanism ensures that the toilet tank only fills with the requisite amount of water, thereby preventing unnecessary water waste.
- Utilize Water-Saving Accessories: Incorporating tank bags or water displacement devices can further minimize water usage with each flush, enhancing overall water efficiency.
Legal and Code Considerations

The initiation of toilet installation necessitates an understanding of local plumbing codes. These codes outline the installation’s design and material specifications. Each jurisdiction imposes unique regulations, ensuring plumbing systems’ safety and efficacy. Engaging with your local plumbing department’s guidelines is imperative for compliance.
Understanding Local Plumbing Codes
Plumbing codes differ profoundly across various regions. Essential components frequently include:
- Minimum clearances around the toilet
- Waste line sizes and venting requirements
- Water supply line specifications
Non-compliance with these codes can incur penalties and pose safety risks. Homeowners must conduct thorough research to ensure their installations meet local standards. For comprehensive insights into residential plumbing code requirements, refer to residential plumbing code requirements.
When to Call a Professional
While DIY projects are enticing, certain scenarios necessitate professional intervention. This includes instances where:
- Significant changes to plumbing layout are required
- The existing plumbing is outdated or damaged
- Local codes necessitate a permit for installation
Engaging a professional ensures adherence to plumbing codes and minimizes risks associated with improper installations. A skilled plumber offers reassurance and invaluable expertise throughout the installation process.
Upgrades and Enhancements
To elevate your toilet experience, consider integrating various upgrades that emphasize both comfort and functionality. The addition of a bidet attachment and the transition to comfort height toilets are two notable enhancements. Each offers distinct advantages, capable of transforming your bathroom experience.
Adding a Bidet Attachment
The incorporation of a bidet attachment can revolutionize personal hygiene and comfort. Its installation is straightforward, attaching directly to your existing toilet setup. This modification not only conserves toilet paper but also enhances cleanliness and refreshment. The benefits are multifaceted:
- Improved Hygiene: A bidet attachment can significantly reduce bacteria and alleviate irritations.
- Cost-Effective: It diminishes the necessity for excessive toilet paper consumption.
- Eco-Friendly: It utilizes less water than the production of toilet paper, making it an environmentally conscious choice.
Upgrading to Comfort Height Toilets
Comfort height toilets are specifically designed to offer enhanced accessibility for individuals with mobility issues. These toilets are positioned higher than standard models, facilitating easier sitting and standing. The advantages of this upgrade are evident:
- Increased Accessibility: They are particularly beneficial for the elderly or disabled.
- Enhanced Comfort: They reduce strain on the knees and back, promoting better posture and comfort.
- Stylish Designs: Available in a variety of modern styles, they seamlessly integrate with your décor.
DIY vs. Professional Installation
The decision between DIY toilet installation and professional installation profoundly affects both your financial outlay and the project’s success. A thorough understanding of the pros and cons of DIY enables homeowners to make more informed decisions, determining whether to undertake the task independently or seek the expertise of professionals.
Pros and Cons of DIY
DIY toilet installation presents a spectrum of benefits and drawbacks. Homeowners contemplating this option must meticulously consider these aspects.
- Pros:
- Cost savings by circumventing labor fees inherent in professional installations.
- Acquisition of hands-on plumbing skills and experience.
- Unfettered control over the installation timeline and process.
- Cons:
- Time-intensive, particularly for those lacking prior experience.
- Exposure to errors that could result in leaks or structural damage.
- Potential for increased expenses if professional intervention is necessitated to rectify issues.
When to Hire a Plumber
In certain scenarios, opting for professional toilet installation may be more advantageous. If you encounter any of the following circumstances, engaging a professional can prove more economical and time-efficient:
- Complex plumbing configurations necessitating specialized expertise.
- Insufficient time or availability to execute the installation independently.
- Uncertainty regarding local plumbing codes and regulations.
Conclusion and Final Thoughts
Embarking on the journey of toilet installation necessitates a concise recap of the pivotal steps. The process commences with the meticulous gathering of materials, progresses through the connection of the water supply, and culminates in a thorough leak test. Each stage is indispensable for a successful installation. Attention to detail, such as ensuring proper drainage and sealing connections, is paramount to averting future complications.
Recap of Key Steps
- Prepare your space by measuring accurately and removing any old fixtures.
- Gather your necessary tools and supplies before starting the installation.
- Follow a step-by-step guide to secure the wax ring, attach the toilet bowl, and fit the tank.
- Connect the water supply lines and double-check all connections for leaks.
- Test the flushing system to ensure everything works as it should.
Encouragement to Get Started
Final thoughts on toilet installation advocate for a DIY approach, presenting it as a fulfilling endeavor that not only elevates your bathroom’s functionality but also augments your self-assurance in tackling home improvement projects. The satisfaction derived from successfully completing the installation is unparalleled. Approach this endeavor with eagerness, and you will soon experience the fruits of your labor.
Final Tips and Resources
Embarking on a DIY toilet installation project can yield immense satisfaction, provided one has access to comprehensive support and information. The utilization of resources dedicated to toilet installation is paramount, as it offers supplementary techniques and troubleshooting tips. These can significantly streamline the installation process, rendering it more efficient. A myriad of materials, ranging from expert advice to visual aids, are available to guide the DIY enthusiast.
Helpful Resources for DIY Enthusiasts
Home improvement stores such as Home Depot and Lowe’s serve as treasure troves for DIY aficionados. They provide an array of resources, including workshops, expert consultations, and installation aids. Furthermore, YouTube is replete with installation guides, offering step-by-step visuals that complement written instructions. These resources are invaluable, ensuring a successful installation and addressing potential concerns.
Engagement with community forums, where seasoned DIYers share their experiences and insights, is also advisable. These forums offer real-life examples and innovative solutions, enhancing the DIY journey. It is crucial to remember that with the appropriate resources, one is better equipped to tackle their DIY project.